
Introduction:
In the modern construction industry, where every detail matters and timelines are tight, it’s crucial to have the right tools for the job. Traditional methods of design and project management often struggle to keep up with the complex demands of modern construction projects. This is where Tekla Structures comes in. As one of the most advanced and reliable building information modeling (BIM) software solutions, Tekla Structures offers structural engineers, architects, contractors, and fabricators the ability to deliver high-quality, efficient, and error-free projects.
If you’re just starting in the world of BIM or structural design, Tekla Structures can seem overwhelming at first due to its extensive feature set. However, it’s a powerful and flexible tool that’s designed to cater to both beginners and experienced professionals. This guide aims to introduce you to Tekla Structures, walk you through its key features, and give you the resources and tips you need to start using the software confidently.
What is Tekla Structures?
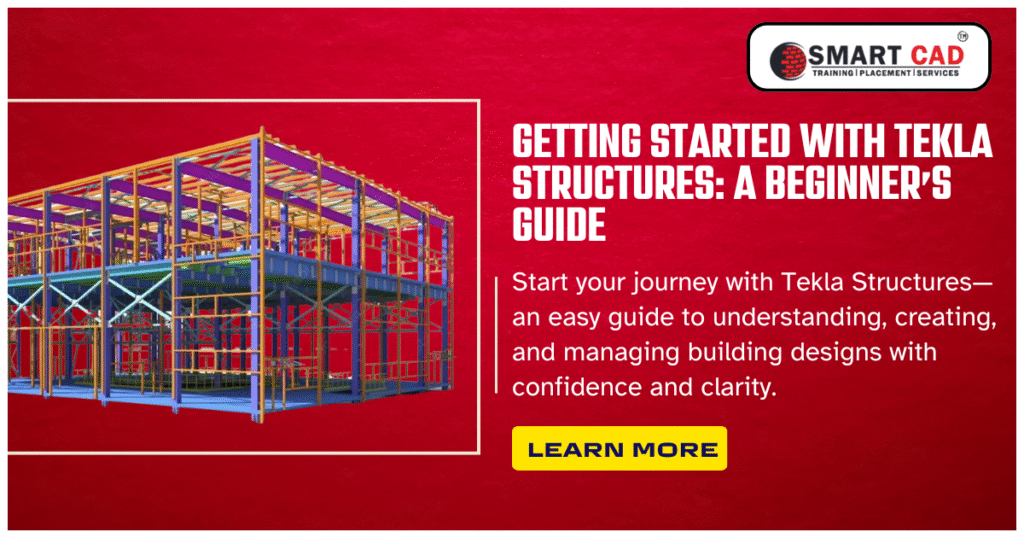
Tekla Structures is an advanced 3D modeling and BIM software that enables users to design, model, and manage complex building structures with high levels of precision and accuracy. Unlike traditional 2D CAD tools, Tekla Structures is built for large-scale projects, handling a variety of materials including steel, concrete, and timber. It’s widely used for everything from initial design and detailing to fabrication and construction management.
One of the main benefits of Tekla Structures is its ability to integrate with other BIM tools, enabling seamless collaboration across teams, from designers and engineers to contractors and fabricators. This integrated approach ensures that everyone involved in the project is working from the same set of data, reducing the chances of errors or miscommunication.
Key Features of Tekla Structures
- Parametric Modeling: Every element in a Tekla Structures model is interconnected. This means that when you make changes in one part of the design, the rest of the model automatically updates, ensuring accuracy and consistency throughout the project.
- Clash Detection: Tekla includes powerful tools for clash detection, which allows you to identify conflicts between different parts of the structure (e.g., beams clashing with plumbing pipes). Early detection of these issues helps avoid costly and time-consuming rework.
- Automated Drawing Generation: Once the model is complete, Tekla Structures can automatically generate detailed construction drawings, schedules, and material lists. This feature streamlines the documentation process and reduces the potential for errors.
- Advanced Visualization: Tekla Structures allows you to create high-quality 3D renderings and walkthroughs of the project, offering a realistic preview of how the finished structure will look. This visualization is beneficial for both design teams and clients, as it provides a clear understanding of the project’s scope before construction begins.
- Customization: Tekla Structures is highly customizable, allowing you to tailor the software to meet the specific requirements of your project. You can create custom templates, drawings, and reports, enhancing your workflow and making it more efficient.
Why Tekla Structures is Ideal for Beginners
While Tekla Structures is packed with powerful features, it’s also designed to be accessible for those new to BIM and structural design. Here’s why Tekla is a great choice for beginners:
1. Intuitive Interface
One of the biggest advantages of Tekla Structures is its user-friendly interface. The layout is clean, and the workspaces are clearly defined, making it easier for beginners to navigate. Whether you’re working in the modeling workspace, creating drawings, or generating reports, Tekla ensures that all tools are easy to find and use. For those new to the software, there are onboarding tutorials to guide you through each step of the process.
2. Hands-On Learning
Tekla Structures is designed to encourage interactive learning. As a beginner, you can start working on projects right away. Instead of just reading through theory, you’ll be able to immediately create real-world projects and experience how Tekla Structures works. You can begin with simple tasks like creating basic building models and gradually tackle more complex projects as you become comfortable with the software.
3. Extensive Online Resources
For new users, Tekla offers a wealth of resources to support your learning journey:
- Free Webinars and Video Tutorials: These resources break down key concepts of Tekla Structures, guiding you step by step through various features.
- Tekla Campus: This learning platform provides free access to Tekla Structures software and a range of learning materials specifically designed for students and beginners.
- Tekla User Community: The community offers a space where you can ask questions, share tips, and learn from other users. It’s a great resource for troubleshooting and learning practical tips.
4. Real-Time Support
Tekla provides excellent support for all users, whether you’re a beginner or an advanced professional. In addition to the comprehensive help documentation, Tekla’s support team is available to assist you with any technical issues you may encounter. The support forum also provides solutions to common problems, helping you solve issues quickly.
Benefits of Tekla Structures for Structural Engineers and Designers
As a beginner, Tekla Structures offers many features that will help you work more efficiently and effectively:
1. Increased Productivity
Tekla Structures automates many aspects of the design and documentation process. This includes automatically generating construction drawings, material takeoffs, and quantity lists, saving you time and reducing the risk of human error. The result is improved productivity and faster turnaround times for your projects.
2. Real-Time Collaboration
With Tekla Structures, all project stakeholders can work on the same model simultaneously, promoting collaboration and ensuring that everyone is working with the latest version of the design. Whether you’re an engineer working on structural elements, a contractor coordinating the construction, or a fabricator preparing the components, you can all contribute to the project in real-time.
3. Accurate 3D Models
Tekla Structures allows you to create detailed 3D models that are both precise and rich in data. For beginners, this is a great way to better understand how the individual parts of a structure fit together. Unlike 2D drawings, 3D models offer a more tangible and realistic representation of the design.
4. Clash Detection and Error Prevention
Clash detection in Tekla Structures helps identify potential conflicts between different elements of the design, such as pipes, beams, or walls. Early detection of these issues is essential for preventing errors that could delay the construction phase. As a beginner, this feature will help you avoid common mistakes and learn how to create more efficient designs.
5. Material Takeoff and Estimations
One of the most powerful features of Tekla Structures is its ability to automatically generate material takeoffs from your 3D model. This reduces the need for manual calculations and ensures that materials are estimated with accuracy. As a beginner, this feature helps you understand the quantities and costs involved in a project, allowing you to design more cost-effective structures.
How to Get Started with Tekla Structures
1. Install Tekla Structures
To start using Tekla Structures, the first step is to install the software on your computer. Here’s how you can get started:
- Download: Go to the official Tekla website and download the version of the software that corresponds to your operating system.
- Trial Version: If you’re just starting, you can take advantage of Tekla’s 30-day trial version, which gives you full access to the software’s features.
- System Requirements: Make sure your computer meets the necessary system requirements, which include having a strong graphics card and enough RAM for optimal performance.
2. Familiarize Yourself with the Interface
Once installed, take some time to get familiar with the interface. The main workspaces you’ll be using are:
- Modeling Workspace: This is where you’ll create your 3D models by placing structural elements such as beams, columns, and slabs.
- Drawing Workspace: This is where you generate detailed construction drawings from your model.
- Report Workspace: Here, you can create reports related to the project, such as material lists, schedules, and other relevant documentation.
3. Start with Simple Models
As a beginner, it’s important to start with simple projects. Begin by creating a basic 3D model of a structure, such as a small building or a simple frame. Focus on learning the basic modeling tools, such as placing beams and columns. Once you get comfortable with the basics, you can move on to more complex models that include connections, reinforcements, and more detailed elements.
4. Use Predefined Templates
If you’re unsure where to start, Tekla offers predefined templates that include standard structural components. These templates can be customized to suit your project’s needs and are a great way for beginners to quickly grasp the software’s capabilities. By modifying templates, you’ll learn how Tekla handles different types of structures.
5. Practice Regularly
As with any software, the more you practice, the better you’ll become. Spend time exploring different features and experimenting with different design approaches. Over time, you’ll become more confident in your ability to model and manage your projects efficiently.